Salesupply
Salesupply
By connecting a Salesupply web store to Returnless, you can easily set up a return form for your web store. Returns that are created can then be easily, automatically processed. The Salesupply integration has these features:
| Feature | Available |
|---|---|
| Search order | ✅ |
| Create coupon | ❌ |
| Create refund | ❌ |
| Create gift card | ❌ |
| Create return | ✅ |
| Return importer | ❌ |
Installation
The connection is set up via the Salesupply API.
Adding an integration
To create a new integration between Returnless and Salesupply, follow these steps:
- Login to your return panel
- Navigate to the Settings > Integrations page where you will find the E-commerce platform section.
- To add a new integration, select the Add new integration button.
- Select the Salesupply integration. A modal will open with further instructions to finish the installation.
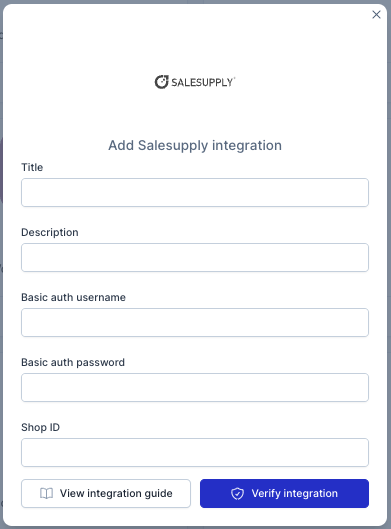
Here are the fields to enter:
| Field | Description |
|---|---|
| Basic auth username | Username for the Shopctrl salesupply API |
| Basic auth password | Password for the Shopctrl salesupply API |
| Shop ID | Your shop ID (number) |
Activating the integration
To activate the integration, you will need to enable the integration in a return form. Follow these steps:
- Login to your Return panel
- Navigate to Settings > Return forms and open the applicable return form.
- Go to the Integrations tab and select the Salesupply which you've added in the previous step.