Retail Suite
Retail Suite is an all-in-one middleware platform which connects to your ERP system. With the Returnless integration, you can automate and streamline the return process efficiently.
Features of the Retail Suite integration
The retail suite integration offers the following capabilities:
- Search order: Customers can easily find their order in the return form.
- Create return: Returns are processed directly within Retail Suite.
How to install
The connection with Retail Suite is set up via the Retail Suite API. For setting up the integration, you will need the following information which you should request from your Retail Suite contact person:
- Client id
- Client secret
- Audience
- Blob storage URL
Once you have received this information, you can proceed with setting up the integration. Follow the steps below to connect Retail Suite with Returnless.
- Log in to the Returnless panel\
- Navigate to Settings > Integrations page.
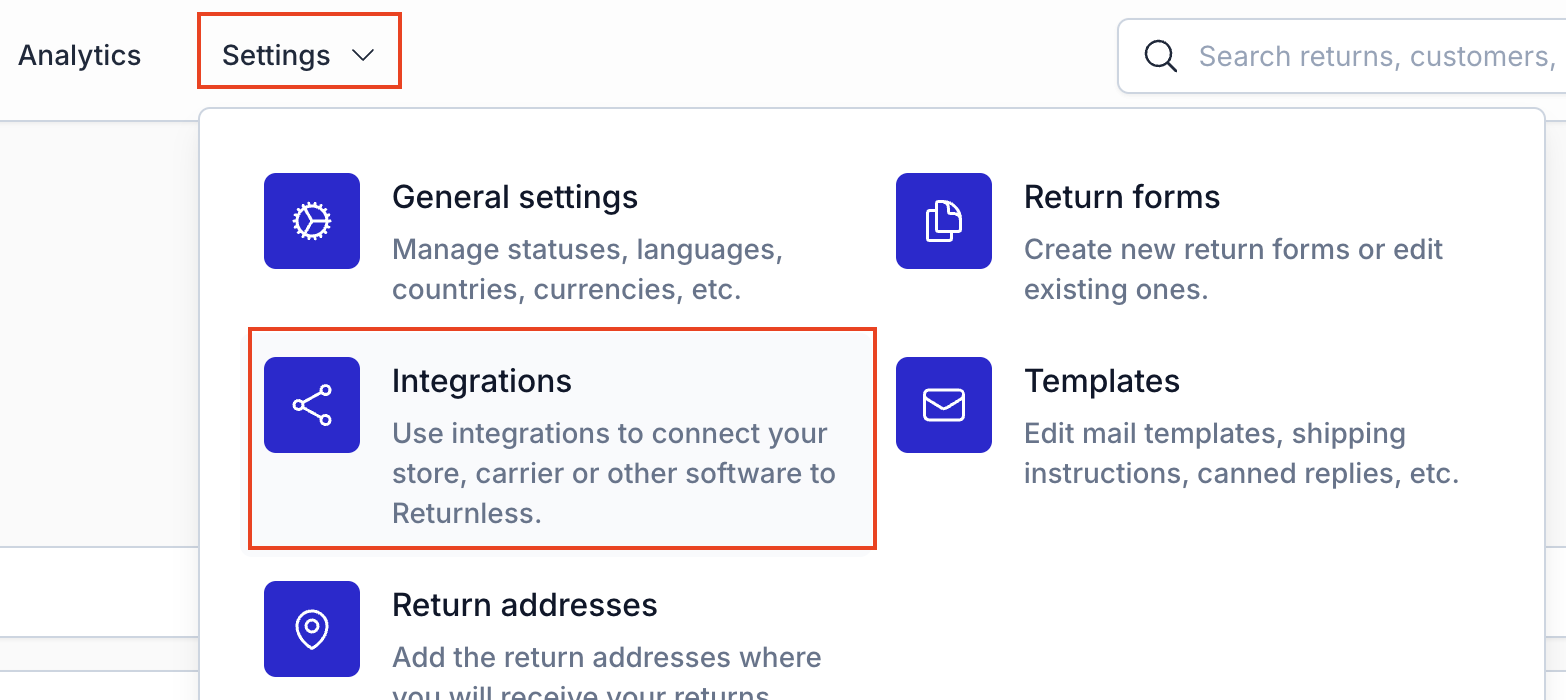
- Click on the Add new integration button in the e-commerce platform section.
- Select the Retail Suite integration. A modal will open, asking you to enter the integration title and integration description. These fields can be used to give a name to the integration so that you know what this integration is used for. Also the client id, Client secret, Audience, Blob storage URL should be filled in. Fill these in as you have received them from your Retail Suite contact person. In Environment fill in whether the integration is connected with a production (live) environment or if it is connected with a test environment.
- Fill in the fields and click on Verify integration.
How to use features
By default, all features will be disabled for the integration. Make sure to activate the features you wish to use.
Activate features
By default, all features will be disabled. In order to start using a feature, make sure to enable the integration in a return form.
To view the feature settings, follow these steps:
- In the return panel
- Navigate to Settings > Return forms and open the settings of the applicable return form.
- Go to the Integrations tab.
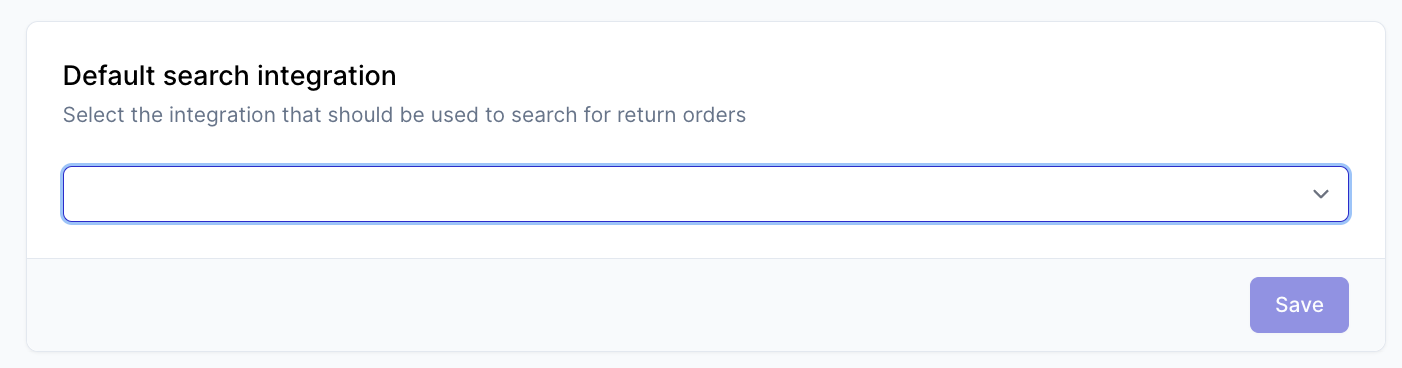
Here you will be able to define the default search integration and enable features.
Default search integration
Only a single integration will be used as the main source when searching for orders. If consumers need to look up the order in Retail Suite, make sure to set this in the default search integration setting. Doing this will automatically enable the Search order feature in the integration features overview for the integration.
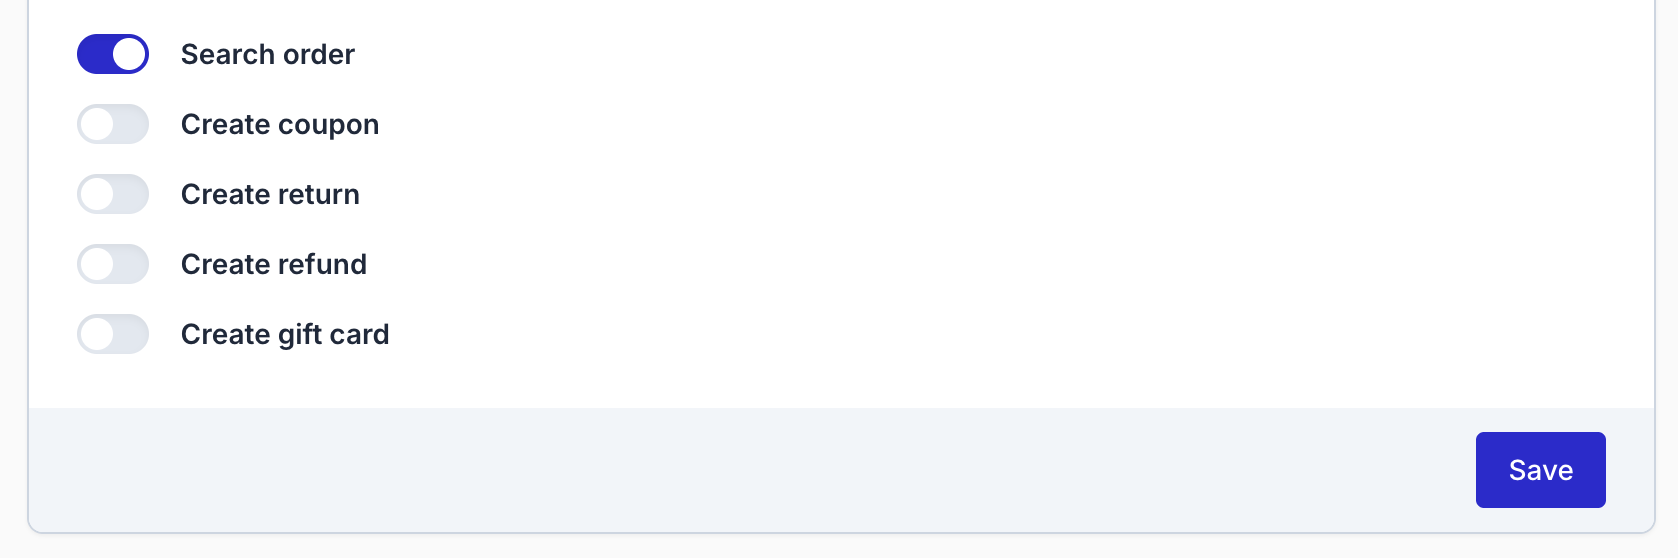
Enable other features
Other features can be toggled in the same overview. Scroll down to the Retail Suite section. Here you will see all available features and whether they are on or off. If you want to enable or disable a feature you can change it here and then click on Save.
Search order
With the search order feature, consumers will be able to find their Retail Suite order in the Returnless return form by using their sales order number.
Search order settings
| Setting | Description | Options |
|---|---|---|
| Order search method | Which Order number field should be used to look up the order in Retail Suite. | Webshop order ID (exact match) Reference (exact match) |
| Validation method | What field should the consumer fill in when looking up the order | Email address Postcode |
Image storage
Returnless will use the Image base URL for displaying the product images. If this URL has changed, make sure to update it in the integration settings as well.
Variant Code
When the order is found, Returnless will add the VariantCode for products for which it gets a variant code to the Meta data field on product level. This allows you to set up conditions in the return rules and automations.
Create return
Returns can be created in two ways:
- Manually create a return by clicking the Create return button in the return detail page.
- Automatically by setting up an automation.
Once a return is created in Retail Suite, you will be able to see the return in Retail suite as well as on the return detail page in Returnless.
Create return settings
In order to create a return in Retail Suite, a mapping is needed for the return reasons. In the mapping section you can specify which Returnless return reason should be mapped to which return reason in Retail Suite.