Shopify
Shopify is a powerful e-commerce platform for managing your online store. With the Returnless–Shopify integration, you can automate and streamline the return process directly within your Shopify admin.
Before You Begin
⚠️ Plan requirement: A Shopify Grow, Advanced, or Plus plan is required. Shopify Basic is not supported.
Features
| Feature | Description |
|---|---|
| Search order | Customers can look up their order in the return form using their order number. |
| Create return | Returns are created directly within Shopify, visible in the customer account and admin. |
| Process refund | Refunds are issued to the customer's original payment method via Shopify. |
| Refund as store credit | Issue a refund as Shopify Store Credit instead of to the original payment method |
| Generate discount code | Offer a discount code as an alternative to a cash refund. |
| Create gift card | Issue a gift card as an alternative to a cash refund. |
How to install
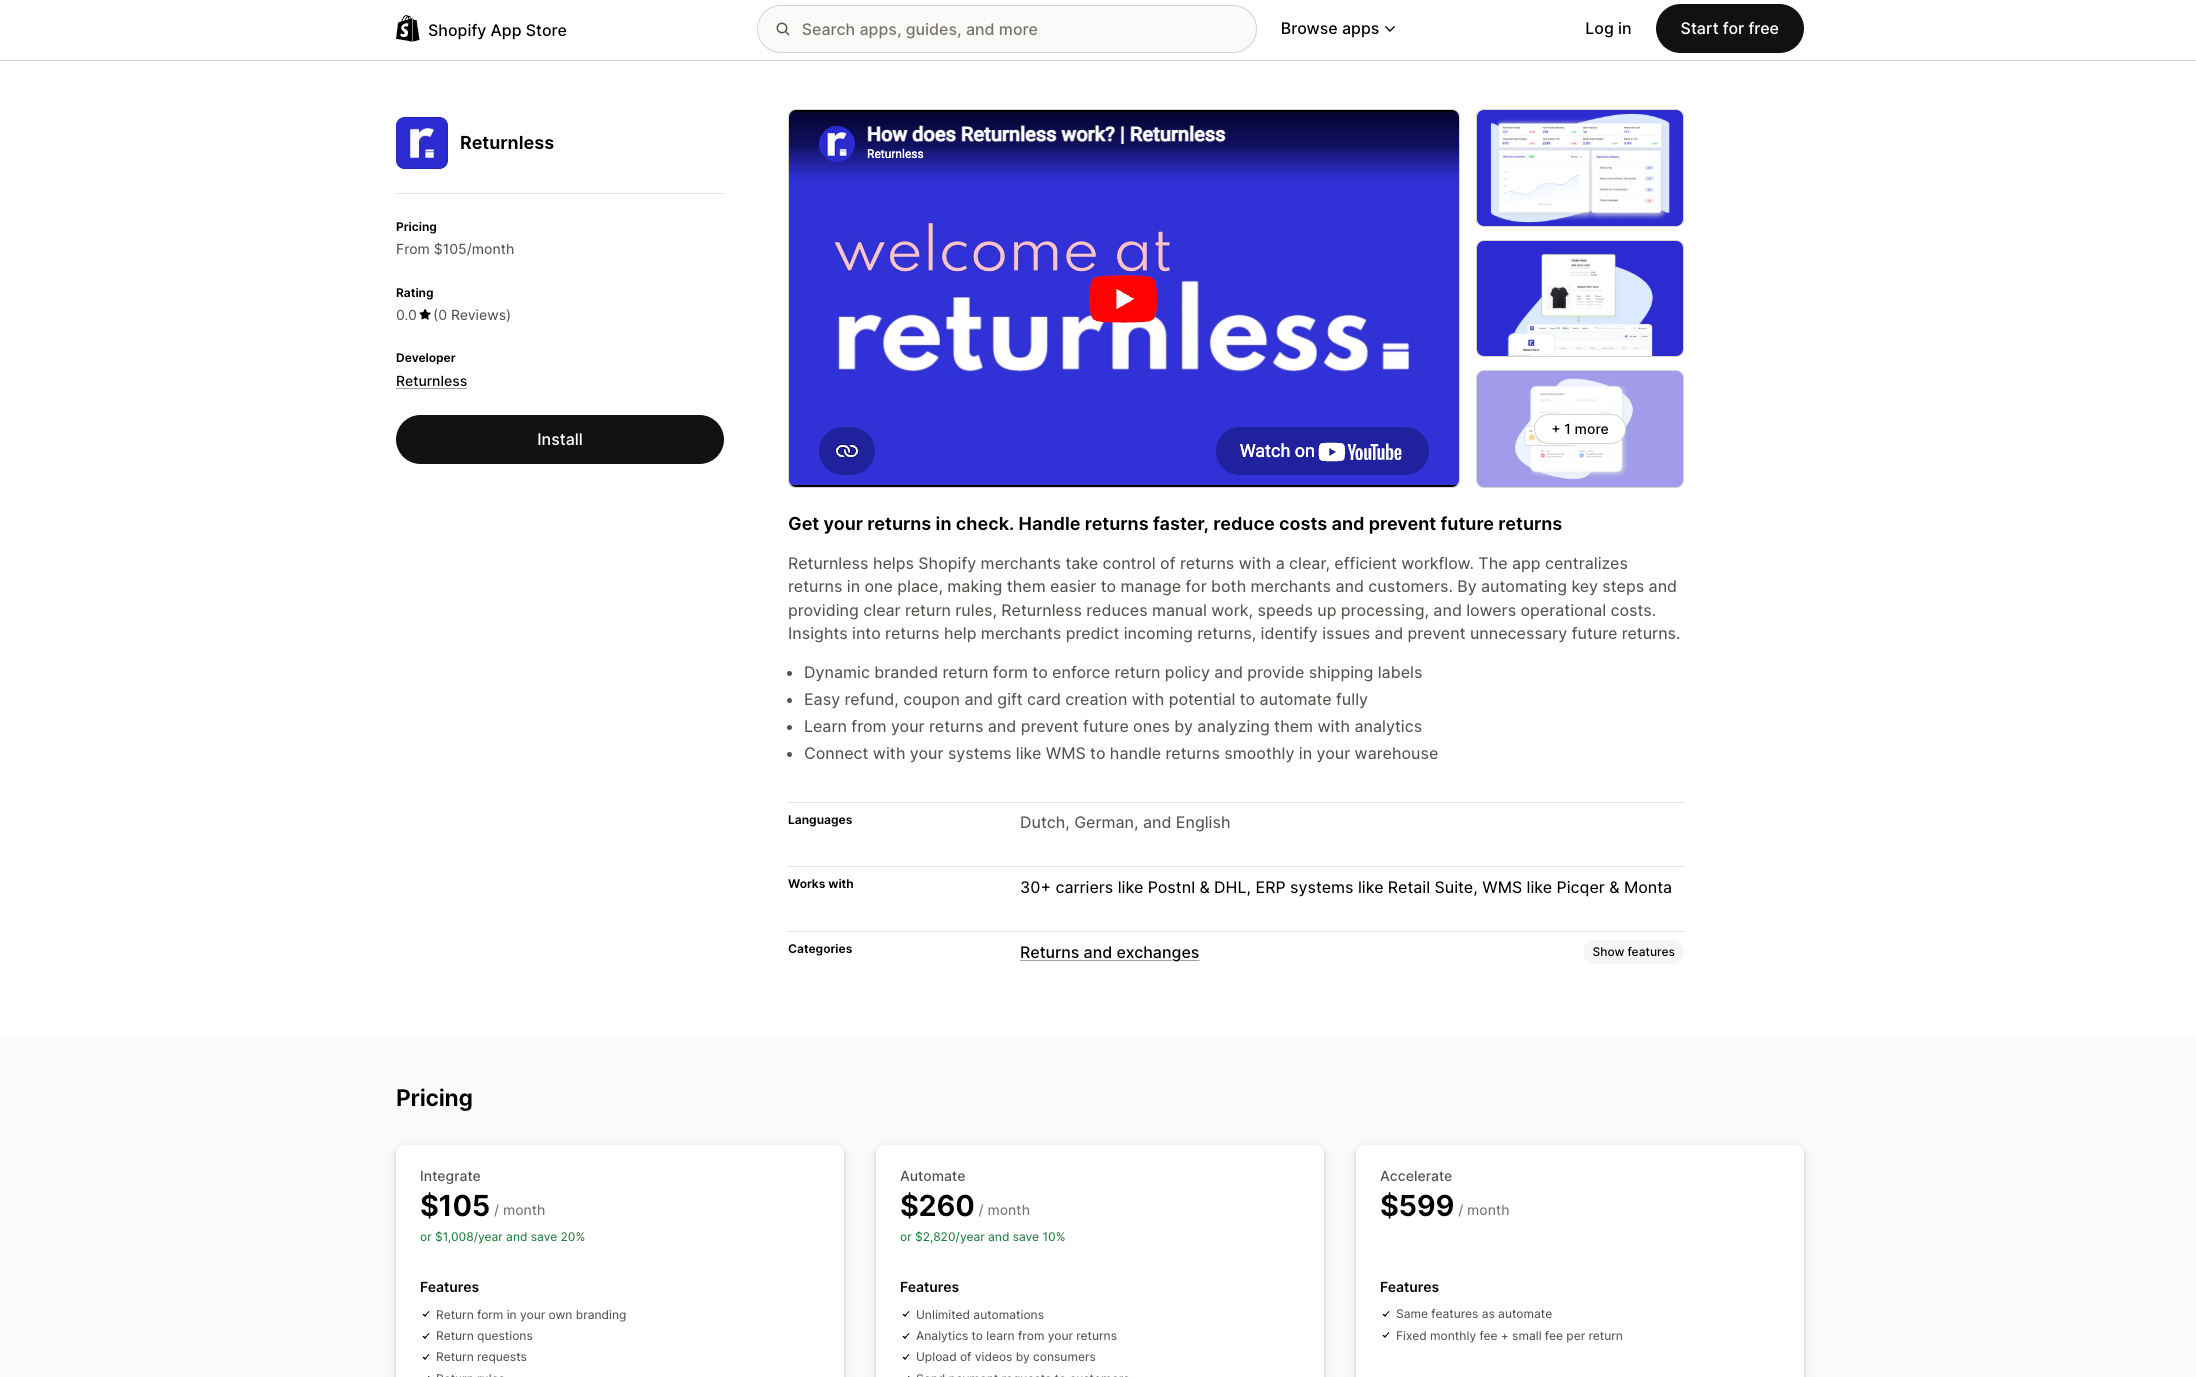
The Returnless–Shopify connection is set up via the Shopify App Store.
Step 1: Open the Returnless app in the Shopify App Store
Go to the Returnless app on the Shopify App Store and click Install.
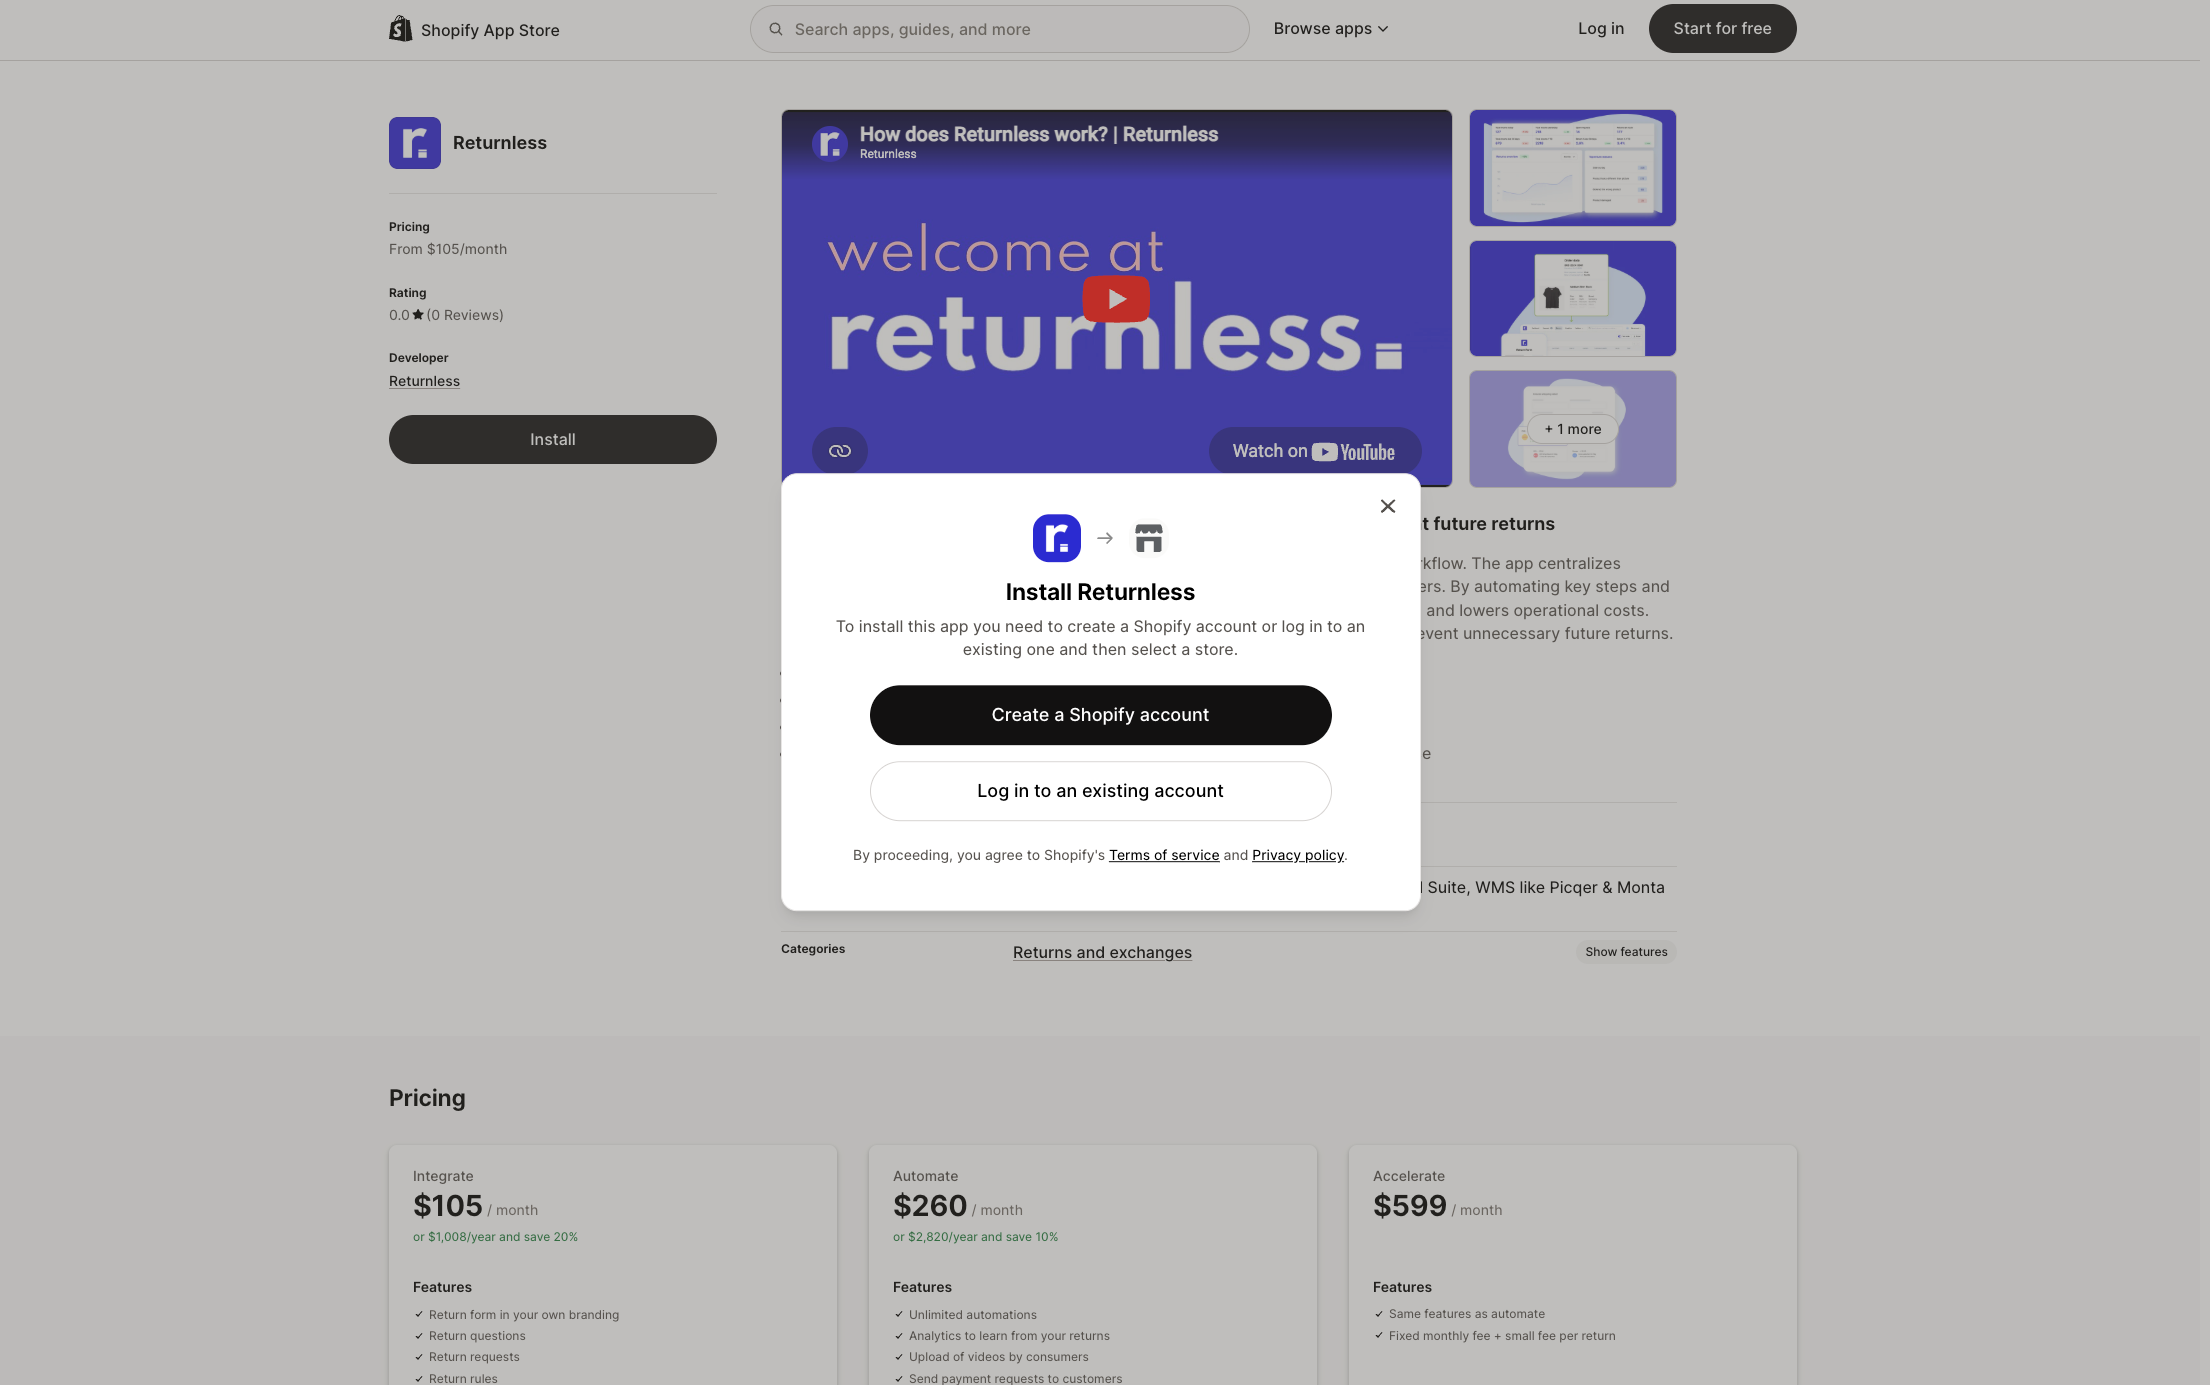
Step 2: Log in to Shopify
If you're not already logged in to Shopify, you'll be prompted to do so. Choose Log in to an existing account and select your store from the account picker.
⚠️ Make sure the correct store is selected. There is no way to switch stores during the install flow. If the wrong store is shown, cancel, switch stores in your Shopify admin, and then restart the installation.
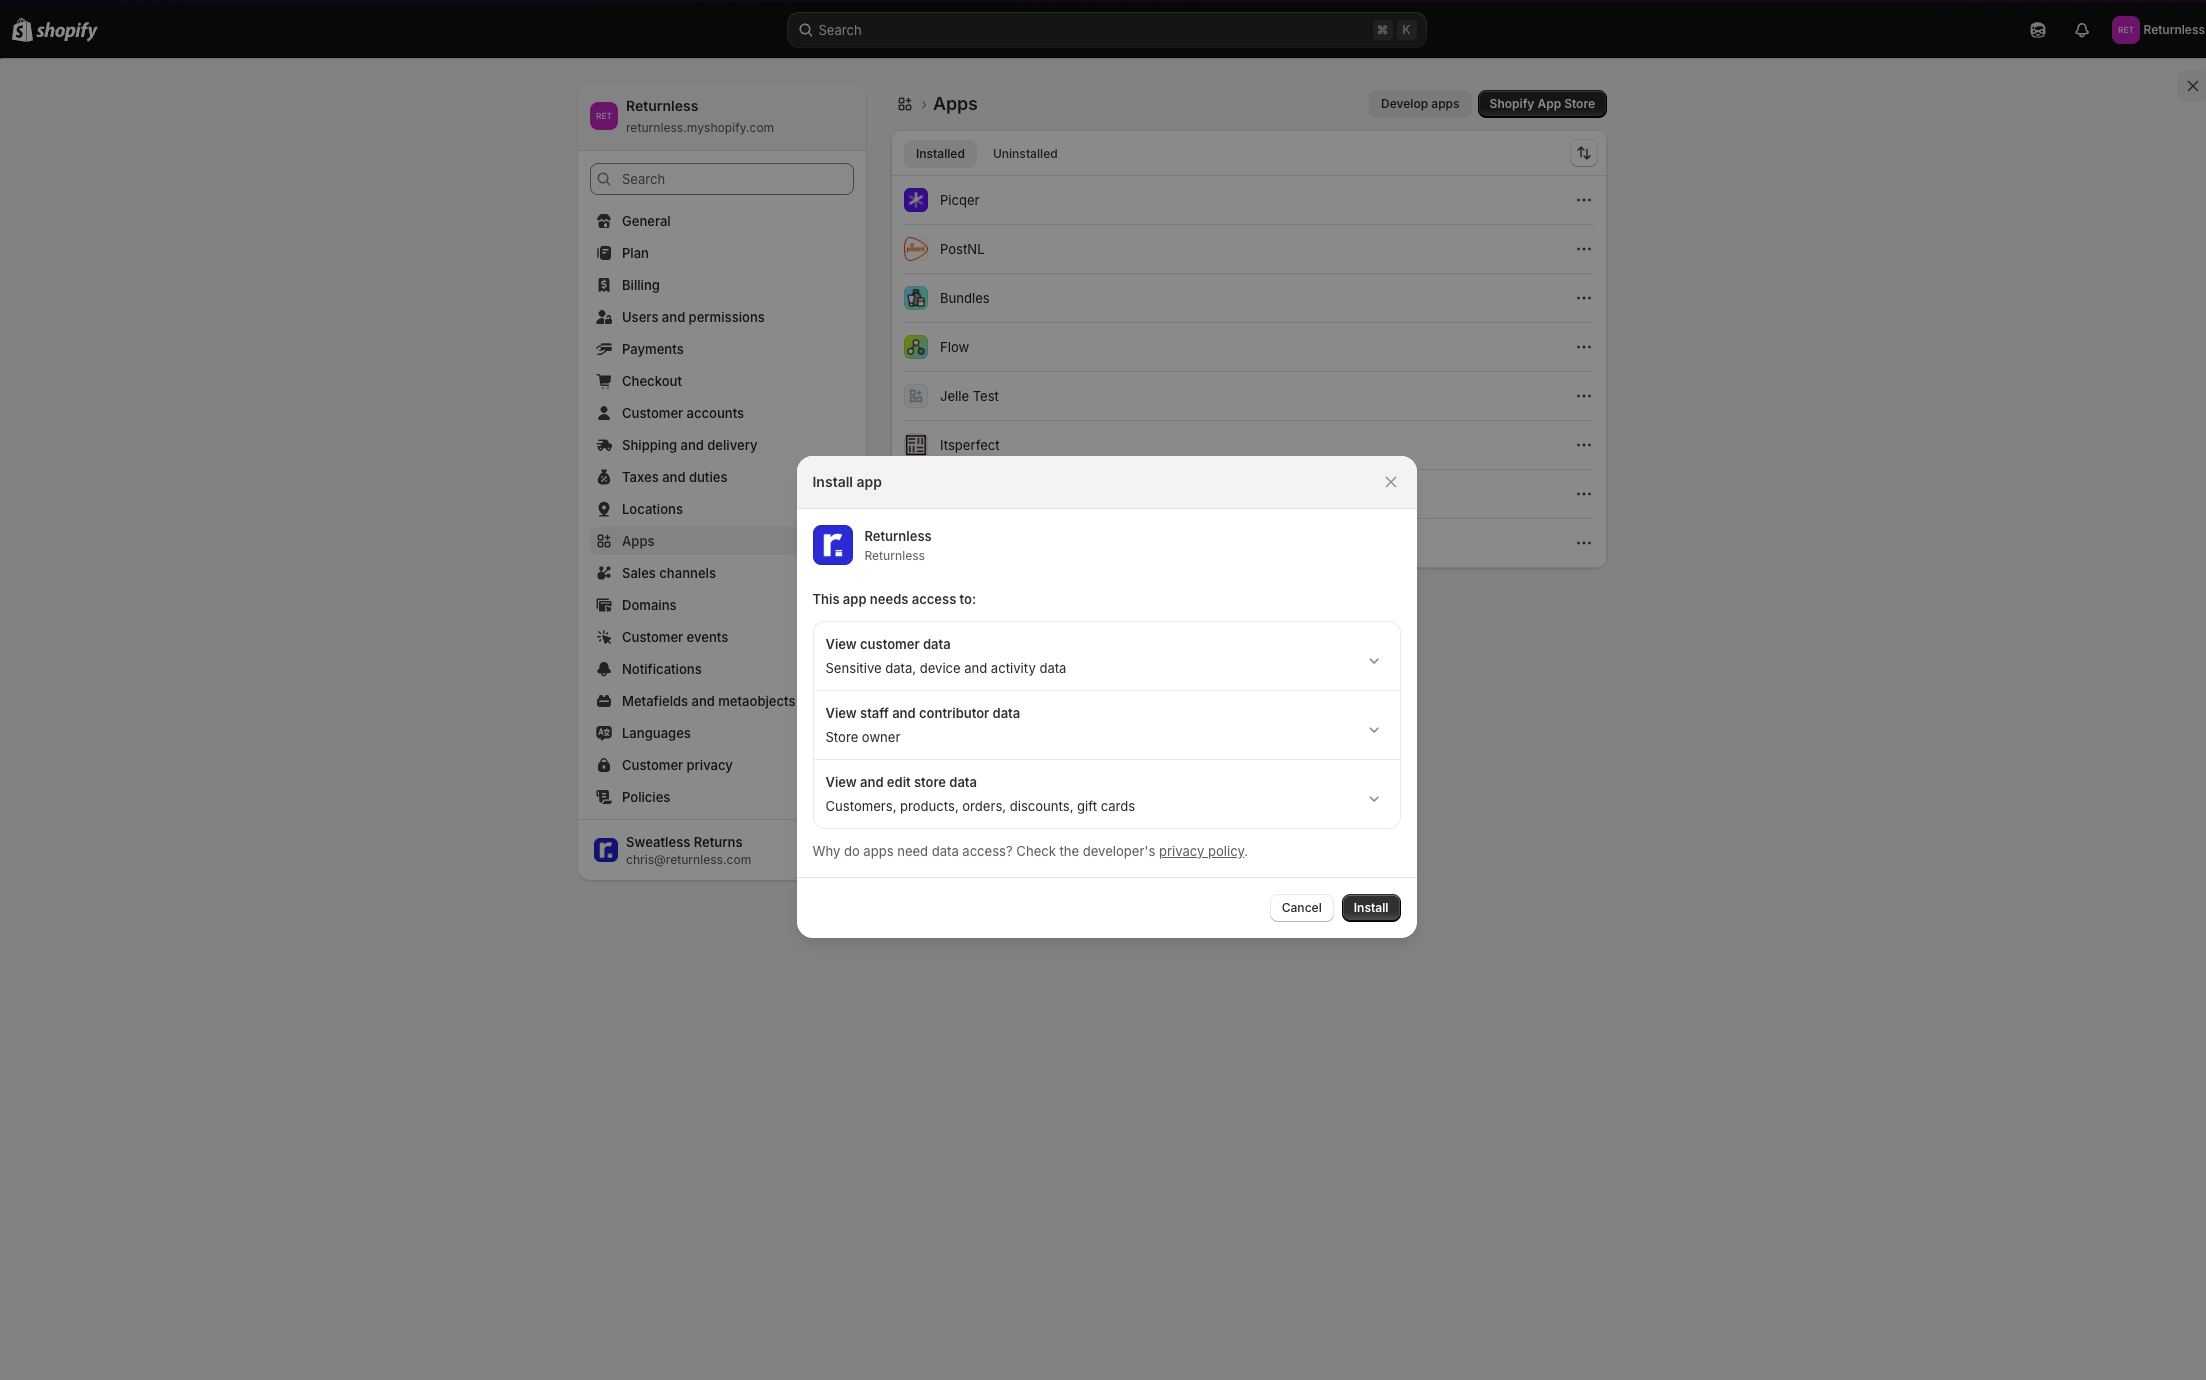
Step 3: Approve permissions
Shopify will show an Install app dialog listing the data access Returnless requires (customer data, store data including orders, discounts, and gift cards). Click Install to proceed.
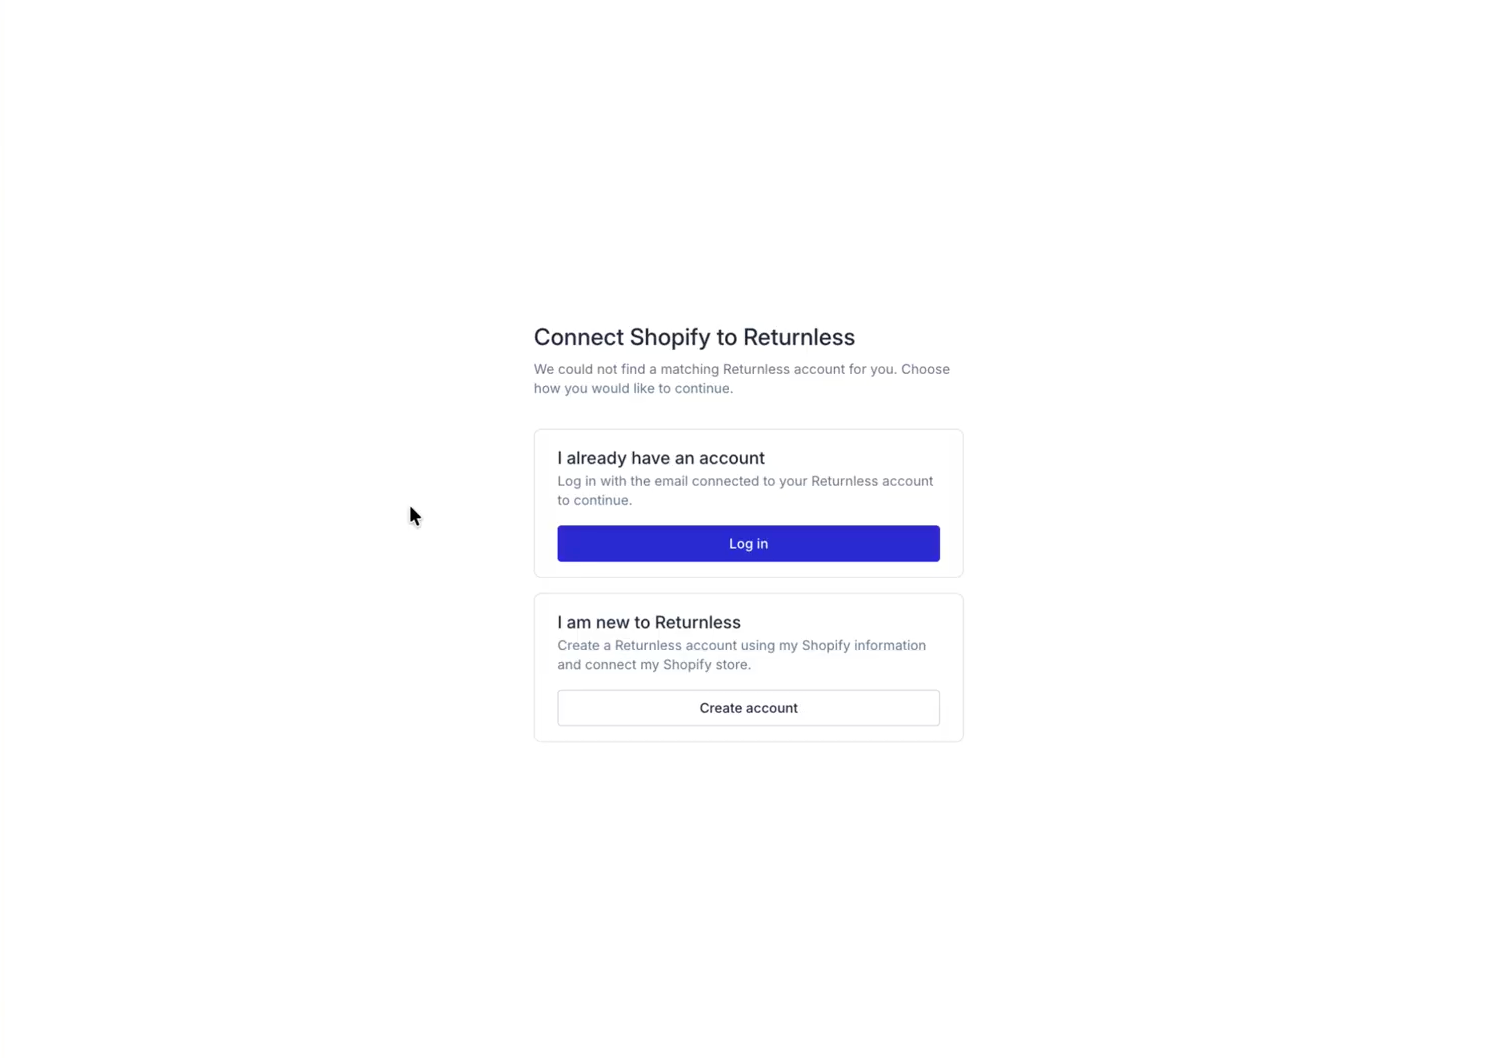
Step 4: Connect to your Returnless account
After approving permissions, Returnless will check whether your store or email domain is already associated with an account:
- Existing account detected: You'll be taken to the Returnless sign-in page with a notice that an account already exists for your organisation. Log in with your Returnless credentials to link the store.
- No matching account found: You'll see a "Connect Shopify to Returnless" screen with two options:
- I already have an account: Log in with your existing Returnless account to complete the connection.
-
I am new to Returnless: Create a new Returnless account using your Shopify information.
-
Already logged in to Returnless: If you have an active Returnless session in the same browser, the integration is added to that account automatically and you're taken straight to the Integration settings page.


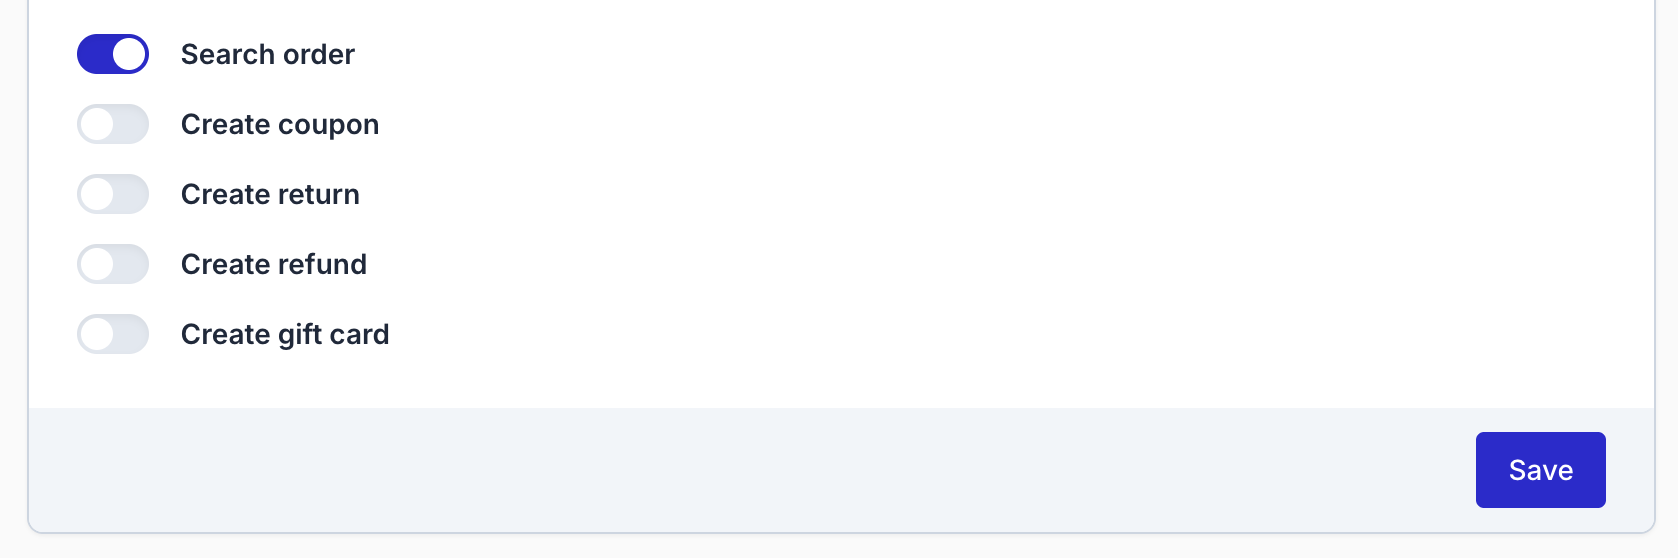
Enabling Features
All features are disabled by default. You need to enable the ones you want to use within each return form.
- Go to Settings > Return forms and open the relevant return form.
- Click the Integrations tab.
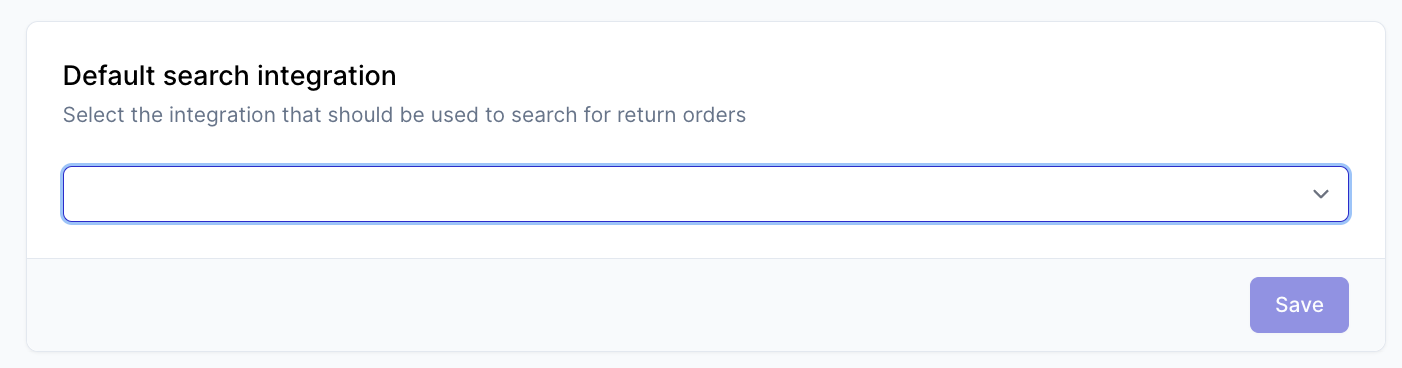
Default search integration
Only one integration can be set as the primary order lookup source. To use Shopify for order searches, set it as the default search integration. This automatically enables the Search order feature for Shopify.
Enable other features
Scroll down to the Shopify section on the Integrations tab. Toggle each feature on or off, then click Save.
Feature Reference
Search order
With the search order feature, consumers will be able to find their Shopify order in the Returnless return form by using their sales order number.
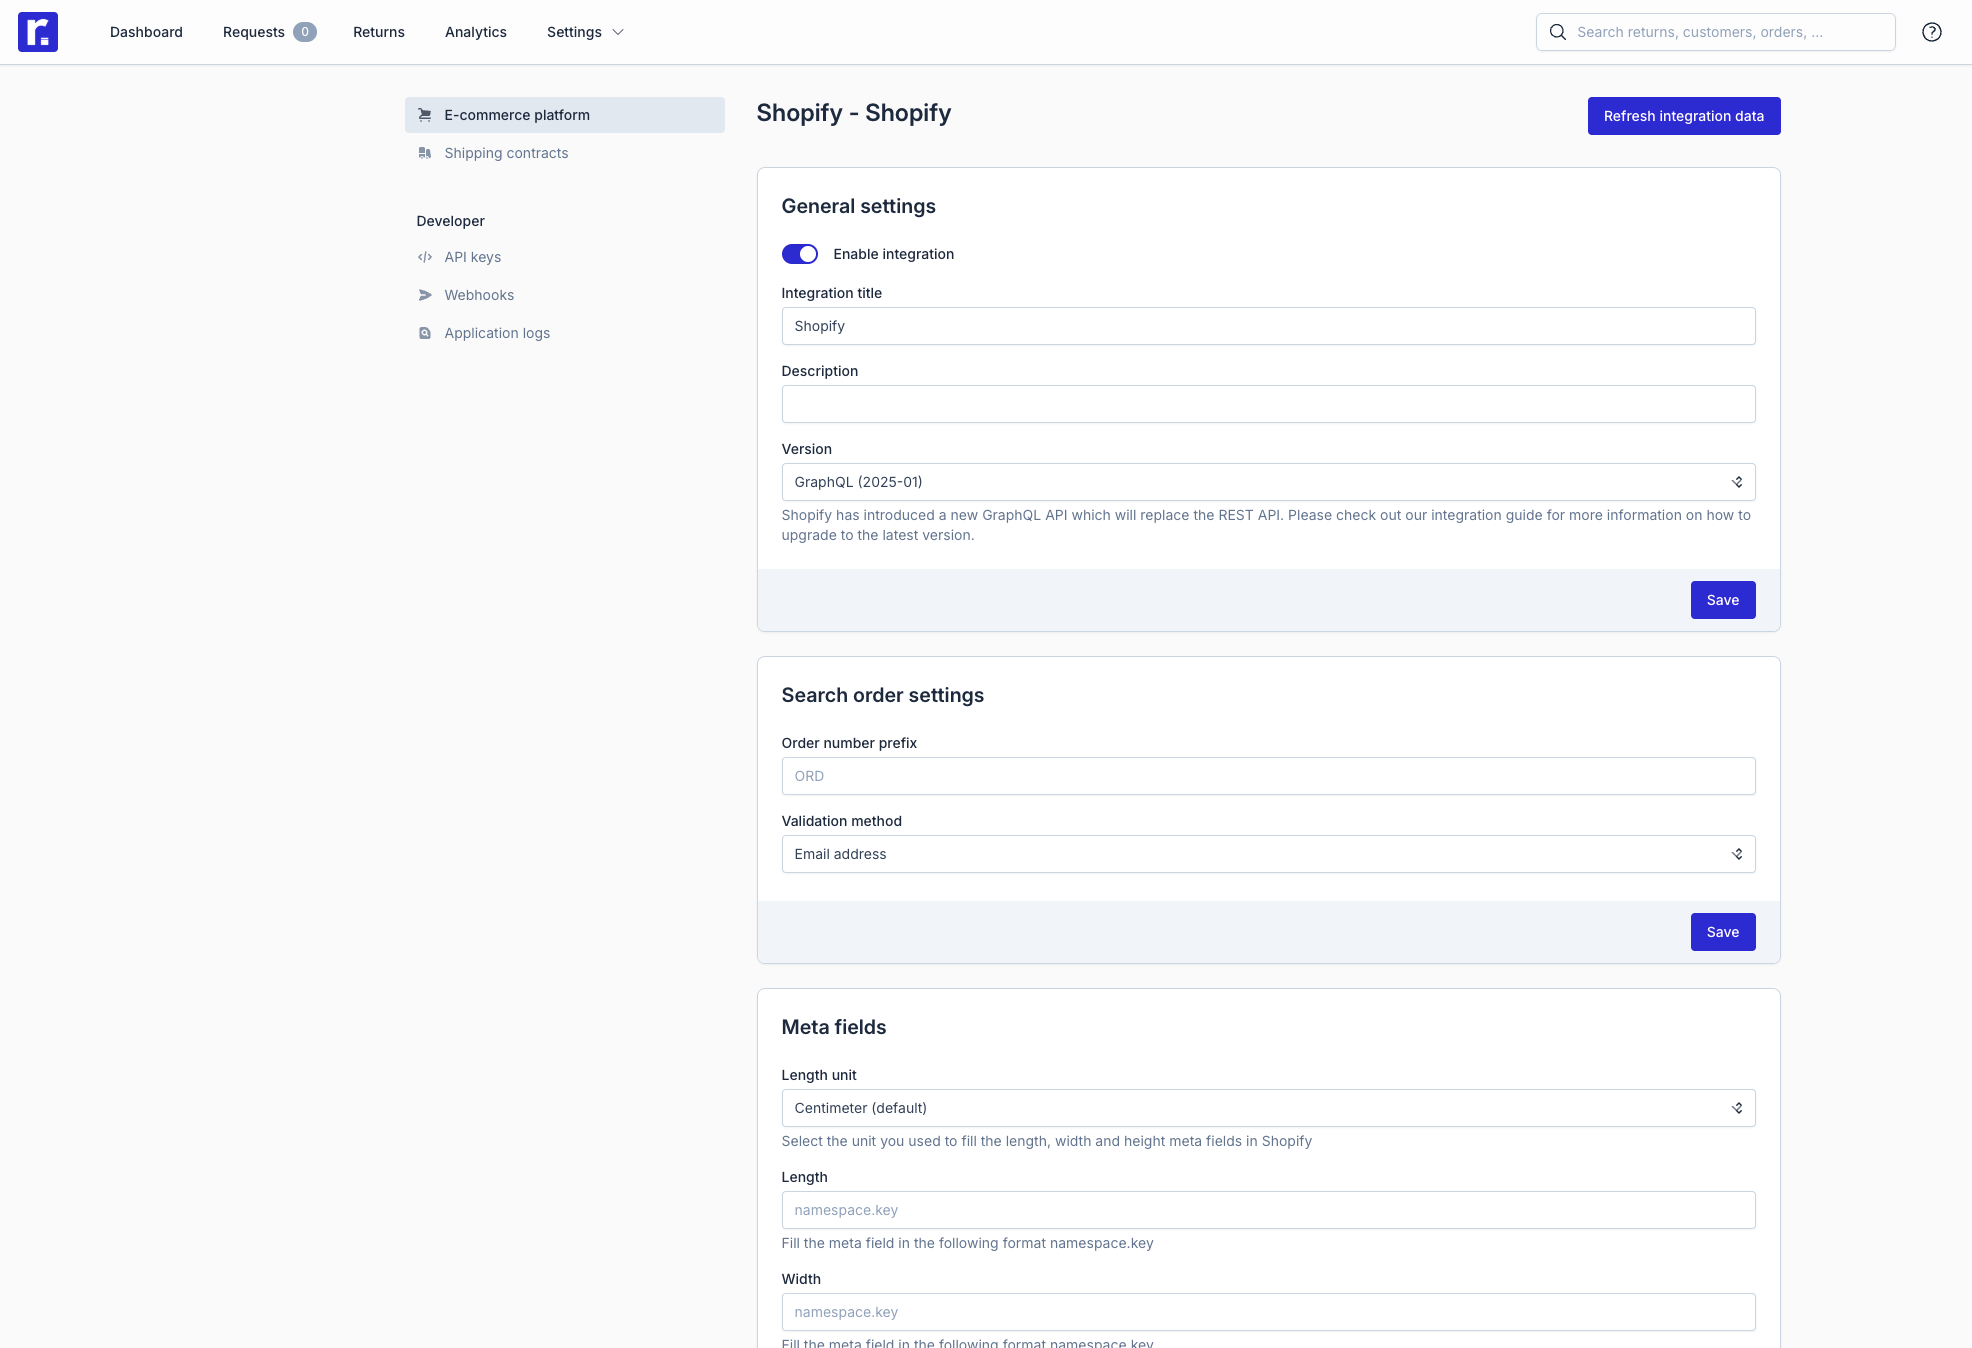
Search order settings
| Setting | Description | Options |
|---|---|---|
| Order number prefix | In Shopify it's possible to set a prefix for your orders. For example ORD00123 has the prefix ORD. In case you enter prefix NL and a consumer searches for order 1234, we will search for both 1234 and NL1234 in Shopify, improving the success rate of finding the order. | For example #, ORD, NL, DE, etc. Leave empty if you do not use a prefix. |
| Validation method | What field should the consumer fill in when looking up the order | Email address Postcode |
Product dimension meta fields
Shopify doesn't include product dimensions by default. If you store dimensions as meta fields in Shopify, you can map them here so Returnless can suggest the correct shipping methods.
| Setting | Description | Options |
|---|---|---|
| Length unit | Select which unit you're using to set the dimensions in Shopify | millimeter, centimeter |
| Length / Width / Height | Specify the way the meta data is saved in Shopify. | For example product.with, variant.height |
Sales order tags
Tags added to Shopify orders are imported into Returnless and saved as metadata under the key sales_order_tags. These can be used as conditions in return rules and automations.
Advanced settings
These settings are typically only needed when instructed by Returnless support.
| Setting | Description | Options |
|---|---|---|
| Order number parameter | Shopify makes a difference between an Order number (123) and Order name (NL123). The name includes a prefix and suffix that you can configure in Shopify. Based on the setting, we will either save the number or the name in Returnless. | Order number, Order name |
| Line item custom attributes | In Shopify, line item custom attributes are additional data fields attached to individual items in an order. They’re typically used to collect extra information from customers about specific products when they add them to the cart. This is useful for customizations, personalization, or any extra input that’s relevant on a per-item basis. Returnless allows you to save custom attributes by adding the attribute keys. The values will then be saved as meta data on the sales order item level, which can be used in Return rules. | For example _product.vendor, _product.size |
| Bundled products | If you're using bundles in Shopify, this setting will allow you to decide if customers can only return a bundle in full, or if they can partially return a bundle (child produdcts). |
|
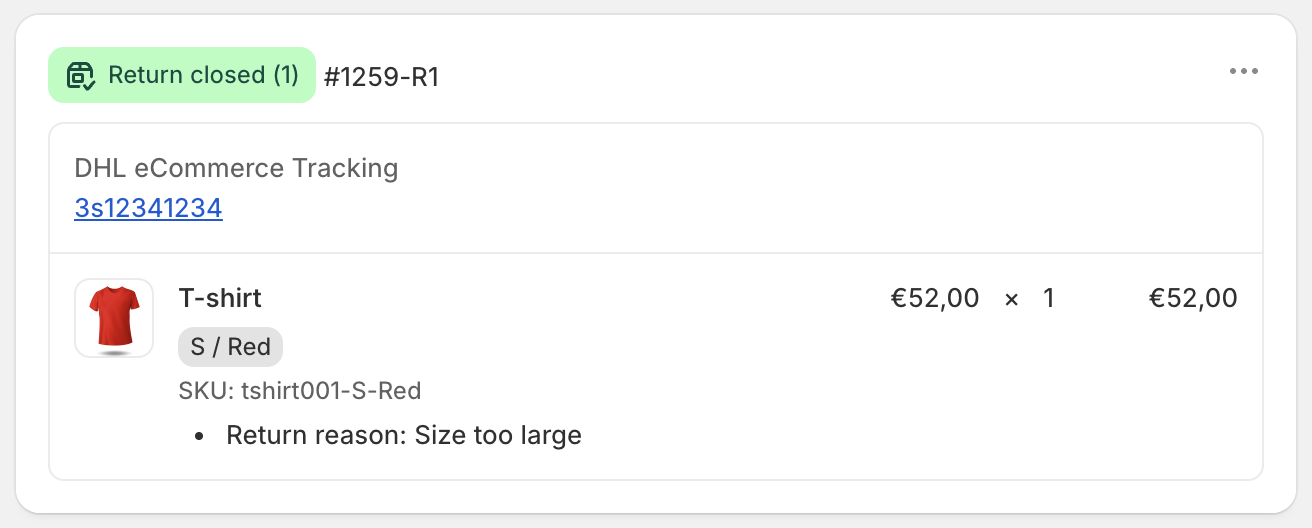
Create return
Creating returns in Shopify is optional and not required for normal Returnless usage. It's useful if you want returns to appear in Shopify's admin and in the customer's account. Creating a return in Shopify does not automatically issue a refund. You'll need to do that separately via Process Refund or Create Gift Card.
Returns can be created in two ways:
-
Manually: click the Create return button on the return detail page.
Automatically: via a Returnless automation.
Once a return is created in Shopify, it will appear in the sales order view in your Shopify admin, as well as in the customer account.
Create return settings
To change the settings for creating a return, follow these steps:
- In the return panel go to Settings > Integrations > Settings.
- In the Return settings block you will find the following settings:
| Setting | Description | Options |
|---|---|---|
| Return status | Decide which status the return has when it is created in Shopify. When the return is In progress, you will manually need to close the return once it has been processed. We recommend the Closed setting, which means that the return has already been processed (which you will do within Returnless). | Closed, In progress |
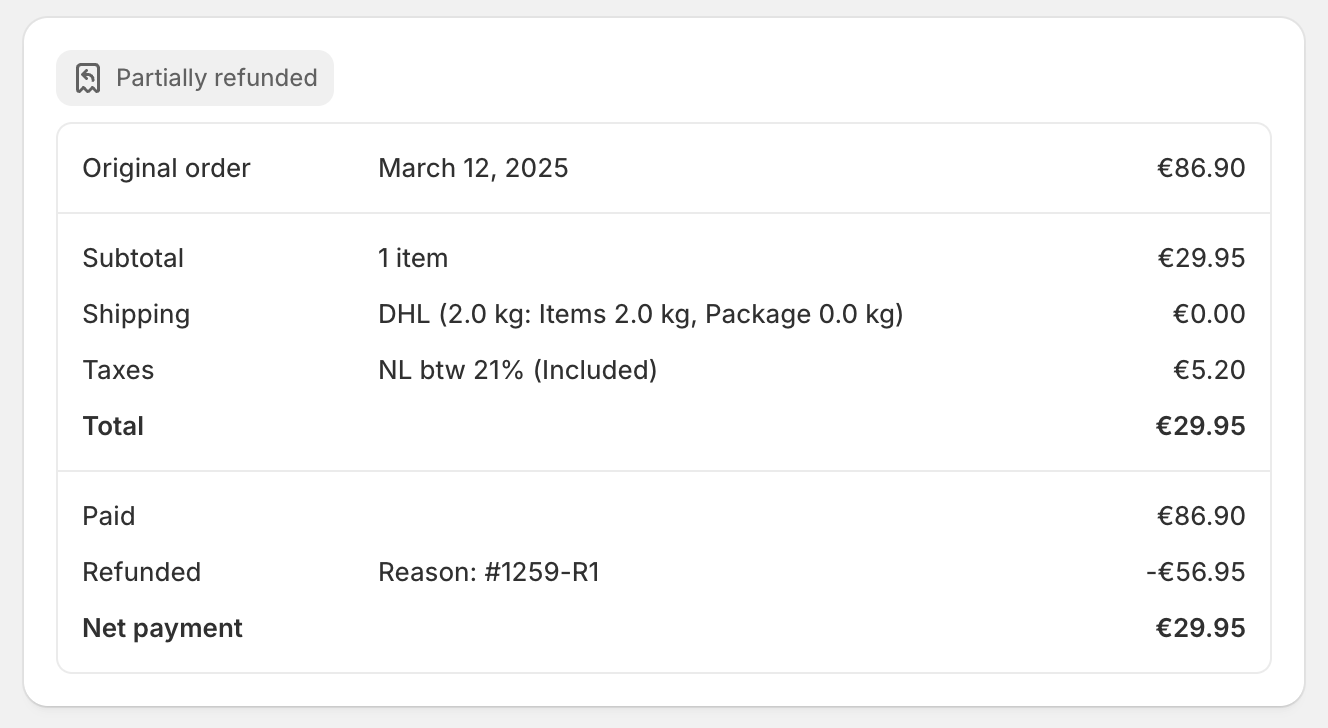
Process refunds
Refunds can be issued directly from Returnless. Once created, Shopify refunds the value of the returned items to the customer's original payment method.
Refunds can be created in two ways:
- Manually create a refund by clicking the Create refund button on the return detail page.
- Automatically by setting up an automation.
Once a refund is created in Shopify, Shopify will refund the value of the selected items to the payment method which was used when the consumer placed the order. The refund will appear in the sales order view in your Shopify admin.
Process refund settings
To change the settings for creating a refund, follow these steps:
- In the return panel go to Settings > Integrations > Settings.
- In the Refund settings you will find the following settings:
| Setting | Description | Options |
|---|---|---|
| Send Shopify email to customer | When enabled, Shopify will send the Order refund email notification to the customer once the refund is created. | True, False |
| Re-stock items | When enabled, we will restock all items based on the "Qty back to stock" (manual refund) or all items based on the "Qty returned" (automatic refund) by marking the sales order as (partially) refunded. | True, False |
Refund as store credit
Returnless supports issuing refunds as Shopify Store Credit. This is useful if you prefer to retain revenue by keeping the refund value within your store.
Store credit refunds can be created in two ways:
- Manually: click the Create store credit button on the return detail page.
- Automatically: via a Returnless automation.
Enabling store credit
- Go to Settings > Return forms and open the relevant return form.
- Click the Integrations tab and scroll down to the Shopify section.
- Toggle Refund as store credit on and click Save.
ℹ️ Store credit is issued directly to the customer's Shopify account. It can be used across future purchases in your store.
Generate discount code
Returnless allows generating discount codes in Shopify directly from the return panel.
Discount codes can be generated in two ways:
-
Manually: click the Generate coupon button on the return detail page.
Automatically: via a Returnless automation.
Once a discount code is generated in Shopify, the discount code will appear in the Discount code section in your Shopify admin.
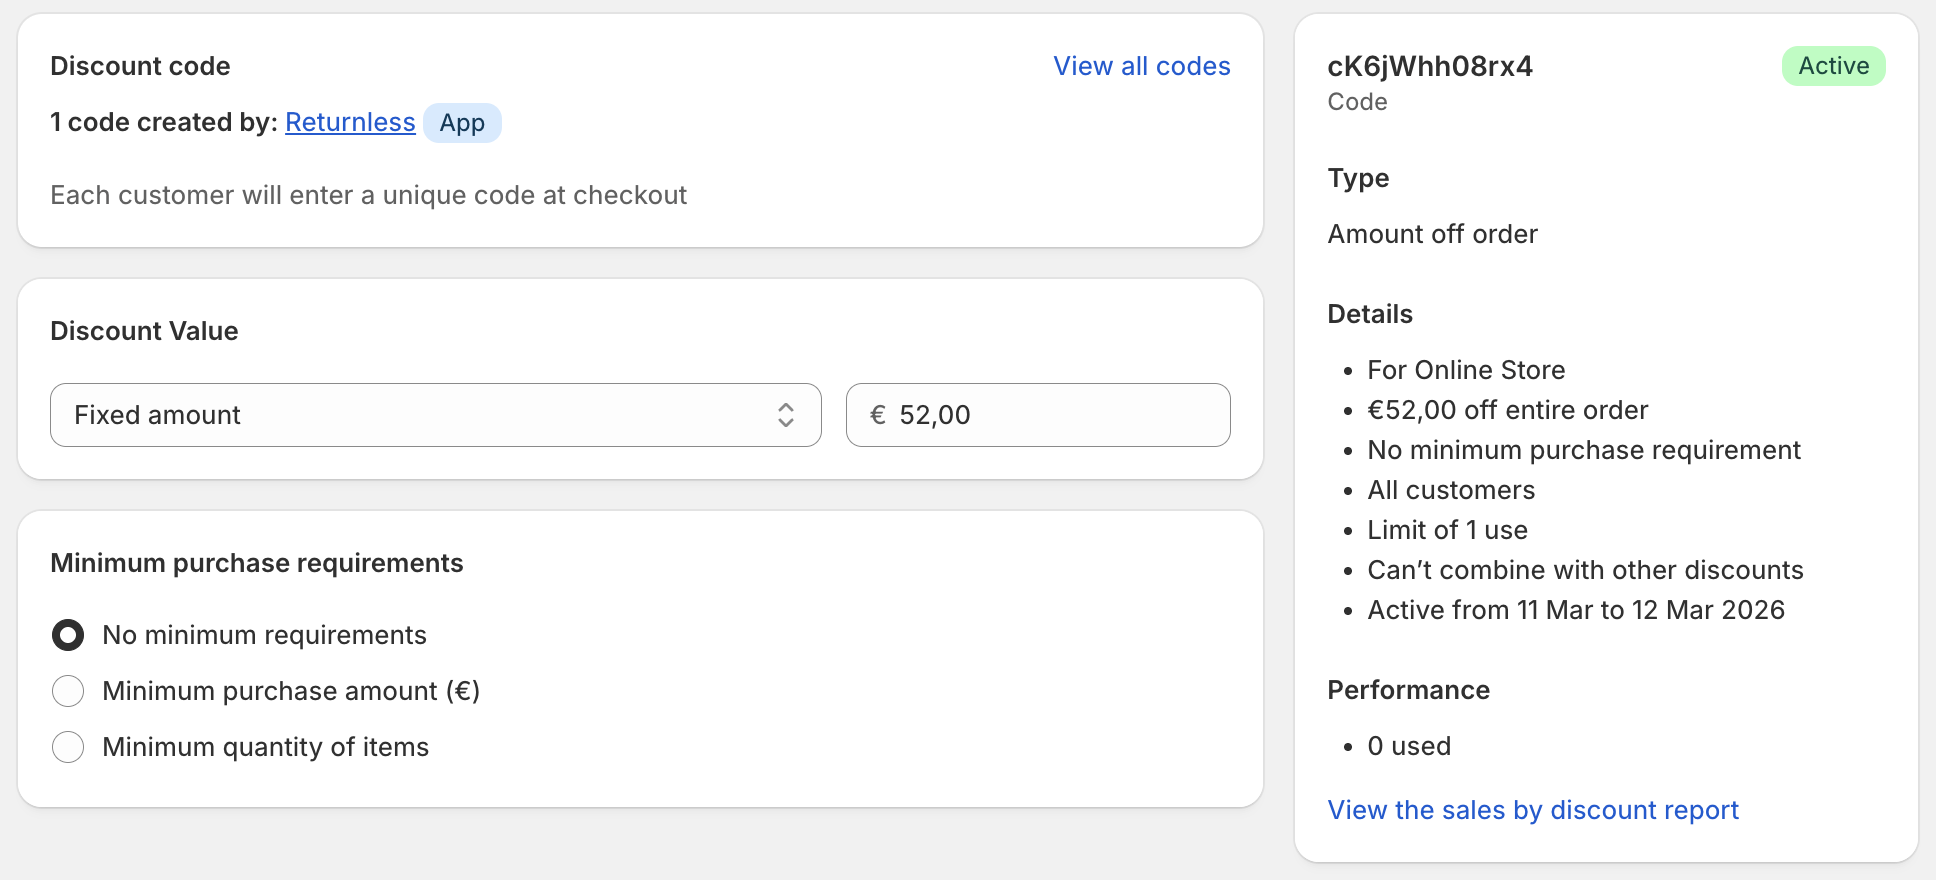
Generate discount code settings
To change the settings for generating discount codes, follow these steps:
- In the return panel go to Settings > Integrations > Settings.
- In the Coupon settings you will find the following settings:
| Setting | Description | Options |
|---|---|---|
| Coupon expiration | Set an expiration date for the discount code. | 7 days, 1 month, 3 months, 6 months, 1 year, 2 years, 3 years, 5 years, No expiration |
| Prevent combination with other promotions | Decide if the coupon code may be used together with product discounts, order discounts or shipping discounts in Shopify. | True, False |
| Re-stock items | When enabled, we will restock all items based on the "Qty back to stock" (manual refund) or all items based on the "Qty returned" (automatic refund) by marking the sales order as (partially) refunded. | True, False |
Create gift card
Returnless allows creating gift cards in Shopify directly from the return panel.
Gift cards can be created in two ways:
-
Manually: click the Create gift card button on the return detail page.
Automatically: via a Returnless automation.
Once a gift card is created in Shopify, the gift card will appear in the Gift cards section in your Shopify admin.
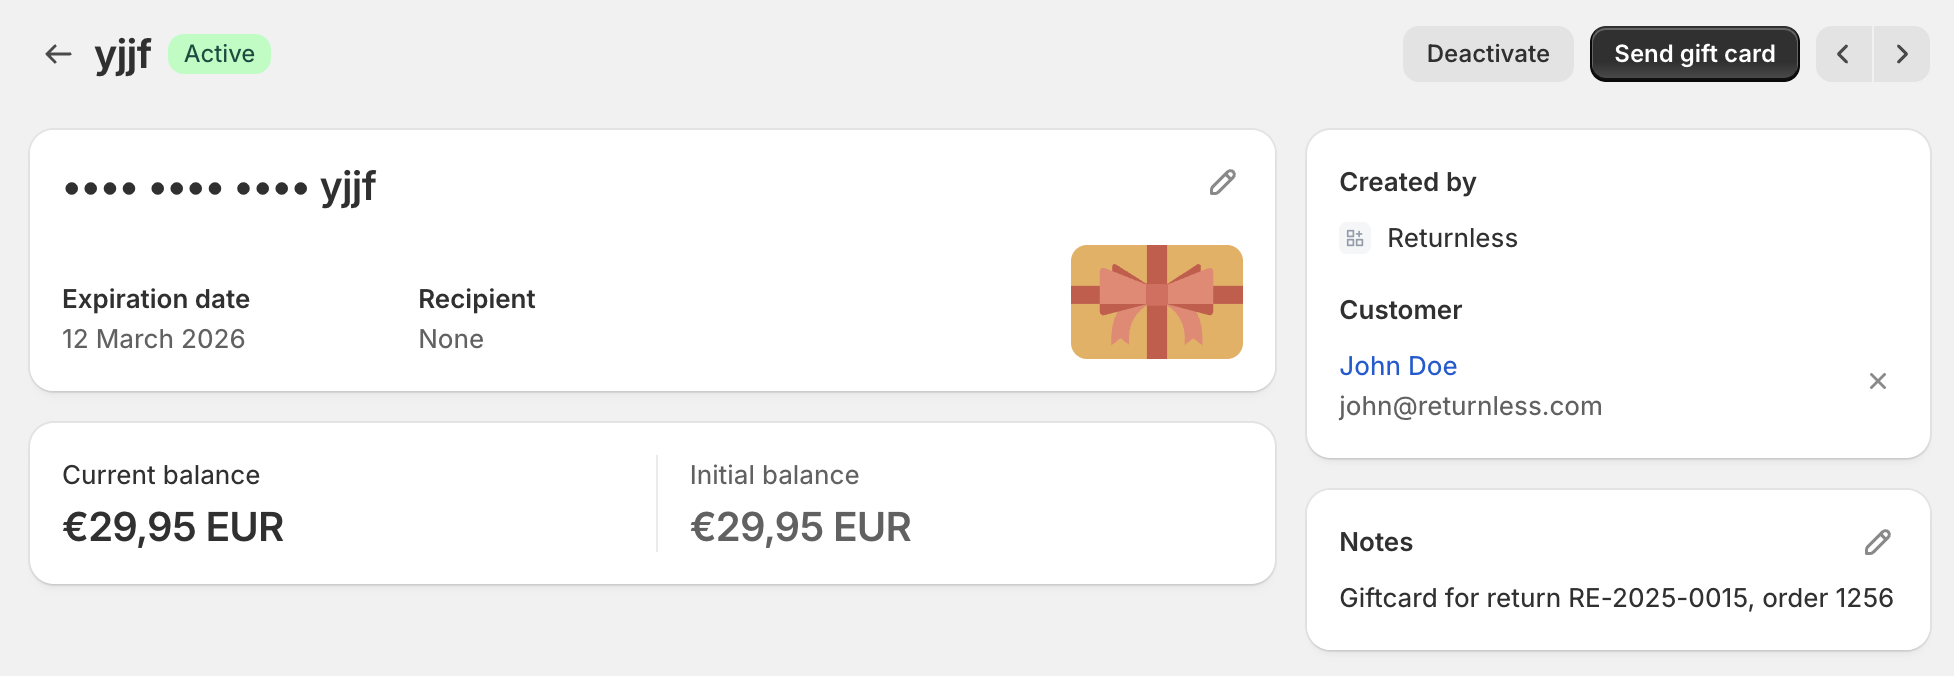
Create gift card settings
To change the settings for creating gift cards, follow these steps:
- In the return panel go to Settings > Integrations > Settings.
- In the Coupon settings you will find the following settings:
| Setting | Description | Options |
|---|---|---|
| Coupon expiration | Set an expiration date for the discount code. | 7 days, 1 month, 3 months, 6 months, 1 year, 2 years, 3 years, 5 years, No expiration |
| Re-stock items | When enabled, we will restock all items based on the "Qty back to stock" (manual refund) or all items based on the "Qty returned" (automatic refund) by marking the sales order as (partially) refunded. | True, False |
Upgrading to API Version 2025-01
In the integration settings you can set a version to use when connecting to Shopify. Currently Returnless supports two API versions of Shopify: 2024-07 (REST) and 2025-01 (GraphQL).
We recommend using version 2025-01 as it's the newest version available. To switch from 2024-10 to 2025-01 you can take these steps:
- In your Shopify admin, navigate to Apps > App and sales channel settings, click Develop apps and open the Returnless app.
- Click Configuration and within the Admin API integration click the Edit button to change the configuration of the scopes.
- You can disable the following scopes:
| Scope | Permissions |
|---|---|
| Price rules | write_price_rules, read_price_rules |
- You should enable the following scopes:
| Scope | Permissions |
|---|---|
| Customers | write_customers, read_customers |
| Discounts | write_discounts, read_discounts |
| Locations | read_locations |
- Click Save
- Within Returnless, navigate to Settings > Integrations > Platform integrations and open your Shopify integration.
- In the API Version settings, select version 2025-01 and Save the integration.
- Optional: after saving your integration, we recommend searching for an order in the return form to make sure that the new integration is setup correctly.
Frequently Asked Questions
What is the difference between a coupon code and a gift card?
In Shopify, both coupon codes and gift cards provide discounts or store credit, but they function differently. The biggest difference between the two is the fact that gift cards have a balance. This balance works like cash in the store and can be used across multiple purchases until the balance reaches zero. Coupons however, can only be used once. In case the consumer has a coupon code of €100 and they purchase something for €80, the rest of the coupon code (€20) is gone.
What is the difference between store credit and a gift card?
Both keep the refund value within your store. Store credit is tied to the customer's Shopify account. A gift card is a separate code the customer enters manually and can be shared or transferred.
What happens when a customer creates a new return?
The return is directly linked to the correct order in Shopify. You can decide to create a return in Shopify as well, or simply wait till you have received the return in your warehouse. Once you have processed the return, you can create a refund or a gift card.
Is the stock automatically updated in Shopify?
Yes, when a refund is created, the stock is also updated in Shopify when you have enabled the Re-stock items setting.
Can I set an expiration date for coupons and gift cards?
Yes, by default we will set an expiration date of 2 years. You can change this to:
- 7 days
- 1 month
- 3 months
- 6 months
- 1 year
- 2 years
- 3 years
- 5 years
- No expiration date