Adding Custom Shipping Methods
Once you have configured your , the next step is to activate it for your customers. By adding a Custom Shipping Method to your return forms, you can control exactly when and how this option appears to your shoppers.
Prerequisites
Before you begin, ensure you have already created a custom shipping contract under Integrations > Shipping contracts.
How to Activate a Custom Method
Follow these steps to add your custom carrier to a specific return form:
- Select your Return Form: Login to your Returnless panel and navigate to the Return forms menu. Click on the form you wish to edit.
- Navigate to Shipping: Inside the form settings, click on the Shipping methods tab at the top of the page.
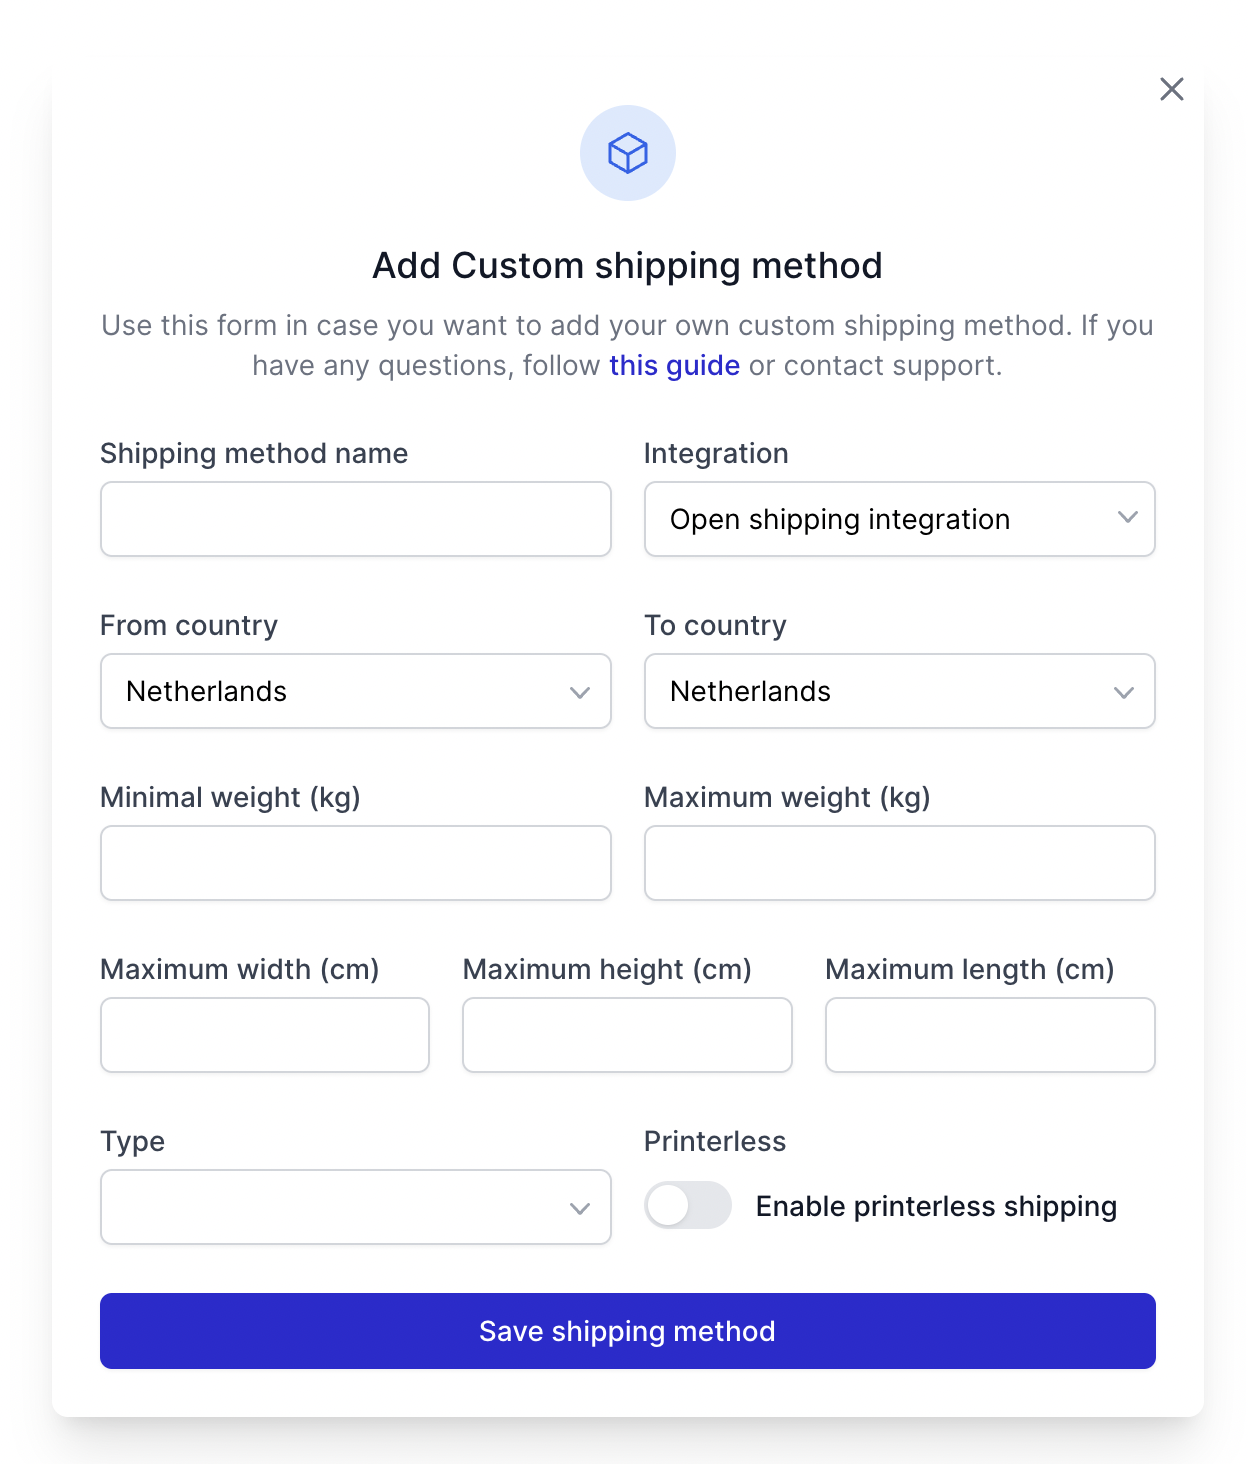
- Add the Method: Click the Add custom method button. A modal window will appear.
- Assign the Integration: Select the custom shipping contract you created earlier and define the specific rules (such as country availability or weight limits) for this method.
-
Save Changes: Once saved, the custom shipping method will be live and visible to customers who meet the criteria you defined.

Pro-tips
- Segment by Region: If your custom fleet only operates in specific postal codes or countries, use the "Availability" settings to ensure only eligible customers see the option.
- Brand Consistency: Use the Carrier Image field in the integration settings to upload a high-quality logo. This builds trust during the return checkout process.
- Test the Workflow: We recommend performing a "Test Return" after activation to ensure your API endpoint correctly receives the data and generates a label.